|
Title: Strike
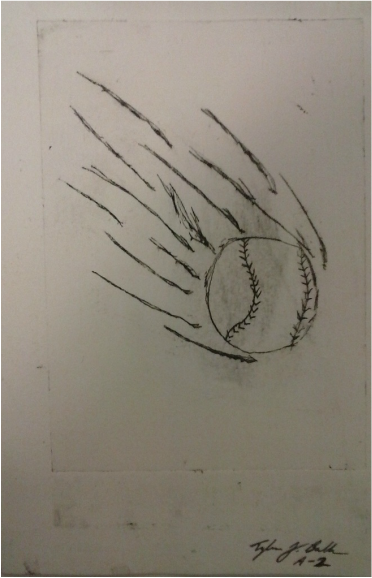
Size: 12.5cm. x 18cm. Medium: Ink on Paper November 2015 Exhibition Text: For my dry point I wanted to continue off of my block print. I intended on my dry point being a continuation of the theme that I had for my block print, which was my obsession and passion for baseball. I wanted to show the next image of the event that would occur next. The artist who influenced my piece was Käthe Kollwitz, because of her usage of lines to express movement and emotion in her pieces. Artistic Inspiration:
My artistic inspiration was Käthe Kollwitz. She used her lines to express the emotion and movement in her art. She mainly used them to help show the theme of her artwork. She used many different forms of lines to present the meaning and theme of the art to the viewer. In my dry point, I wasn't using lines to express the emotion of my piece, I intended on it expressing the movement and speed of the baseball in flight. Also, to show the baseball flying and breaking through the air. Citations: National Museum of Women in the Arts. Käthe Kollwitz. 2014. Web. 11 December 2015. http://nmwa.org/explore/artist-profiles/k%C3%A4-kollwitz |
Meaning of the Piece:
For my dry point I wanted to do a continuation of my block print theme. My theme that I'm continuing for this piece is my obsession and passion for baseball. This time though I changed the design to show the ball in the air after being struck by the bat. In my block print, I had a baseball being struck by the bat, but for my dry point it is after it is struck. I wanted to continue the image and events that are occurring in the two art pieces. I primarily wanted to emphasize my love and passion for the sport, and how I see the game played through my perspective. It's a sport that I can sit down and watch, and I'm never bored of it. At times it playing or watching baseball can help me relieve some stress.
For my dry point I wanted to do a continuation of my block print theme. My theme that I'm continuing for this piece is my obsession and passion for baseball. This time though I changed the design to show the ball in the air after being struck by the bat. In my block print, I had a baseball being struck by the bat, but for my dry point it is after it is struck. I wanted to continue the image and events that are occurring in the two art pieces. I primarily wanted to emphasize my love and passion for the sport, and how I see the game played through my perspective. It's a sport that I can sit down and watch, and I'm never bored of it. At times it playing or watching baseball can help me relieve some stress.
Process:
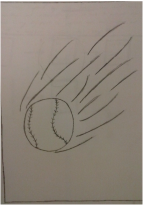
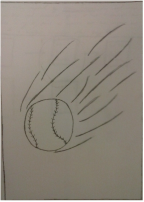
The image to the left is my original sketch and my layout for my dry point. I wanted the ball to have the speed marks coming off of it to give it the feel and movement of velocity. I wanted to incorporate these lines to give the reader an opportunity to gauge what the piece was trying to convey. For this layout I made it like this because there was such little room to carve on the plate that I had to carve it on. In order to properly gauge proportion I had to trace the plate and measure the sides to make a box to draw this design in. This was the easiest part of the process of just sketching and gauging proportion. The harder part came next when it was time to actually carve into the plate.
The image to the left is my original sketch and my layout for my dry point. I wanted the ball to have the speed marks coming off of it to give it the feel and movement of velocity. I wanted to incorporate these lines to give the reader an opportunity to gauge what the piece was trying to convey. For this layout I made it like this because there was such little room to carve on the plate that I had to carve it on. In order to properly gauge proportion I had to trace the plate and measure the sides to make a box to draw this design in. This was the easiest part of the process of just sketching and gauging proportion. The harder part came next when it was time to actually carve into the plate.
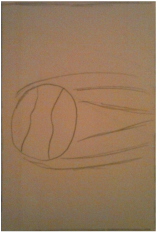
This sketch is fairly simple, and it is just simply a baseball moving in mid-air. In this sketch, I incorporated lines once again to express movement within the print. I made this one to show the ball in flight, and show speed and velocity. Rather than the impact of the bat hitting the baseball. This sketch and the other sketches that I made allowed me to experiment with how the certain usage of lines, and different styles of lines create movement throughout the piece.
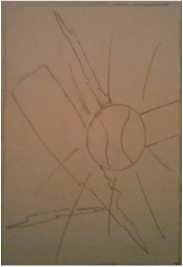
This is another one of my sketches that I made for my block print. All of my sketches stay consistent with what my theme is for this piece. In this sketch, I made a bat shattering after impact with the baseball. This occurs a lot in the pros/major leagues. In it I used lines to show the impact of the baseball and the bat. Plus, the movement of each shard flying off from the bat. I thought that it would be a great way to use lines to show movement throughout the print itself.
As stated before the hardest part other than making the print was carving my design onto the plate. It was hard carving because there is a certain way to carve the plate safely and not cut your hand. It was dangerous, but the tool that I used did have a sharp point and it is smart to take safety precautions. Carving the plate was difficult because of the fact that I had curved lines for the ball, and then the lines that I used to create the look of speed and velocity were partially curved. Also, when I was carving, the lines needed to be deep, but not too deep. This way the ink will be able to get inside of the lines so when you print it the ink will go onto the paper. It also helped with inking the plate, and knowing if the ink was getting inside of those lines.
The next part of this process, and the final step of the dry point was the inking. The inking in some ways was a little complicated, but it turned out to be easier than expected. The main part was to make sure that there is enough ink inside of the lines that were carved onto the plate. This ensures the ability to have enough ink, so when the plate is pressed it can give back a decent print. The first part was to put a piece of watercolor paper which was 12.5 x 18 cm. in a tub of water. This allows for this specific type of paper to absorb the water and become soft. This makes it more ideal for printing. The paper must soak for at least 8 minutes, which is the recommended amount of time. Then, I had to ink my plate that I carved my design on. The ink was sticky, and thick but could cover a lot of space. This meant that only a little bit of the ink was needed as it can go a far way. The main point of this was to make sure the ink was going into the carved lines, and that the ink is thoroughly spread throughout the design. After that, the ideal way to take off the ink from the plate itself and not out of the carved lines was through newspaper. With enough pressure and newspaper, the ink finally came off of the plate and the printing part was ready to commence. Around this time, the timer should go off for the paper that is soaking in the tub of water. The printing was simple, and my first print was a success as it printed my design out clearly.
Reflection:
The overall process of the dry point piece for me was good. I definitely wanted to incorporated my ideas from my block print. This was to follow a continuation of my block print, since both of my themes connect. I think the one part that I would have done better would be to make the print a little cleaner so that the print have barely visible ink smudges. This would have made the piece in general cleaner and better, and it would allow for better craftsmanship. That is really the only thing that I would improve on my dry point, because it's the only thing that can affect the overall piece. It's just the craftsmanship of the piece that needs improvement.
